
Avon Magix Face Perfector

This is prefect for those who tend to get really oily skin in the summer (like me!) What is really interesting about this product is that it comes out as a cream, but when you apply it to your face, it turns into a powder consistency. Pretty neat huh? It's very lightweight so this can be worn over or under your makeup. It's been said to reduce shine for up to 10 hours & also reduces the appearance of pores and fine lines. You don't need to use a whole lot, & just use for the areas that tend to get really shiny looking (a little goes a long way). It also contains SPF 20 which is great for those sunny summer days. I also like the fact that it has a translucent coverage so it's great for all skin colors! The smell (to me) is very tolerable; it smells like a light sunscreen. It also makes my skin feel very soft.
Coral Lip Color!

 Who says you can't rock coral-orange lips? Orange is definitely a spring and summer shade. You don't have to wear a lipstick and go full out orange. If you just want a little color, try a coral-orange lipgloss or just lightly apply a lip liner or lipstick. It pairs very well with neutral eyeshadows. (You don't want to overdo the eyes with bright lips!). It is perfect for warm skin tones. If you are cool toned, try a little something with more blue-based pink in it.
Waterproof Mascara


 Falsies by Maybelline is by far my favorite brand of mascara. It lengthens and thickens mascara. But any brand that is your favorite, stick to waterproof mascara for the summer. It's not only great for swimming but for humid conditions to wear you could possibly sweat your makeup off & comes in handy for those teary-eyed moments.

Summer is a great excuse to wear any bright eye colors, whether it's eyeshadow, eyeliners, or mascara. Now if you don't like all those crazy colors on your eyes with the eyeshadow, and you only want a little pop of color, all you need is a colorful eyeliner. Gel is preferred. It's handled very well with water and only comes off if you rub your eyes or taking it off with makeup remover. It's also easier to apply & remove than pencil liner. If you have no idea what colors to wear, you can always go by your eye color. Here is a simple guideline for first time trying.
For Blue eyes, try blue, brown, or silver eyeliner.
For Brown eyes, try purple, gold, or a bronzy-pink color.
For Green eyes, try plum, emerald, or a pink color.
(note: purple has more blue tones than the plum color!)
For a more dimensional look, apply a darker shade of eyeliner on the outer corners.
Now everyone is different, like me for example, I think purples compliment my blue eyes, so DON'T be afraid to experiment with different colors. You don't have to go by the guidelines, they are just a few options for people who have never tried this. Be your own advocate :)
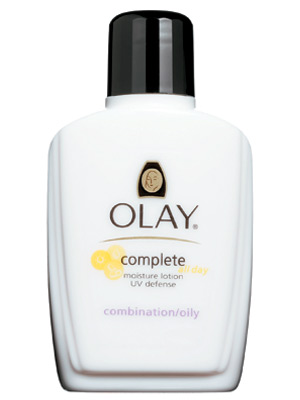
A Moisturizer With SPF 15+

 It is a definite must have for summer. Moisturizers help the skin from drying out and many factors can associate with that in the summer. Like the pool for example, the chlorine can be very drying to the skin. The hot sun can also be very drying and damaging to the skin, so make sure there is SPF in the moisturizer that you are buying. Be careful though, you don't want to wear this if taking pictures with FLASH on your camera in a dark area, this can cause your face to be white as a ghost and not matching the rest of your body. The SPF reflects off the light from the flash and causes "ghost face". It doesn't happen to everyone, but I'm giving you guys a fair warning. :P Try applying a face primer with NO SPF after applying moisturizer (with SPF) and then apply your foundation with NO SPF. Sounds confusing, but will prevent "ghost face." hehe.


 It is a definite must have for summer. Moisturizers help the skin from drying out and many factors can associate with that in the summer. Like the pool for example, the chlorine can be very drying to the skin. The hot sun can also be very drying and damaging to the skin, so make sure there is SPF in the moisturizer that you are buying. Be careful though, you don't want to wear this if taking pictures with FLASH on your camera in a dark area, this can cause your face to be white as a ghost and not matching the rest of your body. The SPF reflects off the light from the flash and causes "ghost face". It doesn't happen to everyone, but I'm giving you guys a fair warning. :P Try applying a face primer with NO SPF after applying moisturizer (with SPF) and then apply your foundation with NO SPF. Sounds confusing, but will prevent "ghost face." hehe.
Ombre Nails!
I've been noticing the "Ombre" trend on the nails are very popular this season. It's been around for many years & is a very fun and interesting look. If you don't know what the ombre style is, its basically a color fading into another, usually from the same color family. There are 2 different types of ombre-style nails.


This effect is the one where each nail has a different shade (of the same color family) on each nail, either making it from darkest shade to lightest or vise versa. This will give the effect of the colors fading into each other with each nail.

Then you have the gradient-like effect where the color fades from top to bottom on each nail. Personally, this is my favorite style because you can use different colors.
How to do the gradient-effect:
It's very simple to do. All you need is a cheap cosmetic sponge, white nail polish, and 2 or 3 different shades of the colors you want to apply including a color in between to help blend the 2 main colors together, and a top coat.
Apply 1-2 coats on your nail with the white polish (this will help the gradient stand out better.)
Then apply the lightest shade out of your choices (paint to about the middle section of the nail).
Then drop a few drops of the polish of your choice for the middle section onto a piece of cardboard or something you don't mind getting polish on. Dab your sponge into it and immediately start dabbing the middle section of your finger and you will notice that it's giving off the "fading" effect.
If you are using 3 shades then go ahead and apply the 3rd shade with the sponge as well to the bottom or top (depending on if you do the darkest at the top or bottom.) Don't go too far over each color, because you still want the colors to show through & you want to avoid it looking too "murky". Apply a topcoat and you're done!
Here's the same style that I did on my toes with a coral and a yellow. Ahh toes in the sand<3 and yes my toes are long, haha. This was at Point Pleasant Beach, NJ btw :)

No Heat Beachy Waves & Different Types

Do you want to have that at the beach hair, without using heat? Make sure to plan it a day ahead, because this is an overnight procedure.
Okay okay, we all know braiding your hair & sleeping in it overnight is one of the ways, but if you braid them different ways, you can get different looks!
Fishtail braid waves - These are a little bit more messy, but that's the point! The waves are tighter and a little but smaller, (depending on how you divide the braids)
If you don't know how to do a fishtail braid here's a video show you!
http://www.youtube.com/watch?v=dcNCn1gbhXg
http://www.youtube.com/watch?v=dcNCn1gbhXg
Regular braids - These are more popular than the others. It will make bigger waves than the fishtail.
French Braids - The difference is french braiding will give you more volume at the top of your head, so if you need more volume, then try this method!
For all of these methods, apply a texturizing spray to you hair and roots to keep the hairstyle looking more natural and to keep it's shape. Try avoiding regular hairspray if you want a soft look.
I will let you find out the results on your own ;) Try it out!


 Yes, I'm sure you've heard of this. I love it. It lightens my hair up just a little to bring out my natural highlights. All you need is some lemon juice and a spritzer bottle, and you're good to go. Just dampen your hair a bit and spray it on. Then lay out in the sun for about 20 minutes. It won't happen drastically, but if you do it for days in a row, you will start to notice your hair getting lighter. It beats spending dollars on store bought lighteners that works just the exact same.

Love, Ash
French Braids - The difference is french braiding will give you more volume at the top of your head, so if you need more volume, then try this method!
For all of these methods, apply a texturizing spray to you hair and roots to keep the hairstyle looking more natural and to keep it's shape. Try avoiding regular hairspray if you want a soft look.
I will let you find out the results on your own ;) Try it out!
Here's me with the fishtail braid waves going on!

Rimmel London Nautral Bronzer!

This one is also a budget-friendly product! Not a big fan of bronzer, BUT once I tired this one, I grew a huge liking to it. I recently started tanning, so this helps a lot to darken the face & match the rest of your body just a little with a sun-kissed glow. It also helps to lightly contour the face!
There's no shimmer to it, and that is why I love it. Bronzing products with shimmer in them tend to make me look like an oil slick, but everyone's skin type is different. If you have oily-prone skin, try to avoid products with shimmer in them...they can tend to make your skin look more oily than it normally is. This product is great for people [like me] who have this problem!
Since this is a more natural finish, if
you are looking to dramatically contour the face, I wouldn't recommend
this because using too much can look too orangey; it's meant for light
usage.
This one is also a budget-friendly product! Not a big fan of bronzer, BUT once I tired this one, I grew a huge liking to it. I recently started tanning, so this helps a lot to darken the face & match the rest of your body just a little with a sun-kissed glow. It also helps to lightly contour the face!
There's no shimmer to it, and that is why I love it. Bronzing products with shimmer in them tend to make me look like an oil slick, but everyone's skin type is different. If you have oily-prone skin, try to avoid products with shimmer in them...they can tend to make your skin look more oily than it normally is. This product is great for people [like me] who have this problem!
Lemon Juice as a highlighter?

Yes, I'm sure you've heard of this. I love it. It lightens my hair up just a little to bring out my natural highlights. All you need is some lemon juice and a spritzer bottle, and you're good to go. Just dampen your hair a bit and spray it on. Then lay out in the sun for about 20 minutes. It won't happen drastically, but if you do it for days in a row, you will start to notice your hair getting lighter. It beats spending dollars on store bought lighteners that works just the exact same. Love, Ash
Interesting! Thank you for writing all of the code in detail.
ReplyDeleteSunless Tanning Lotion