Sunday, October 23, 2011

A Cheap Easy Way to Make Fake Wounds


Halloween is coming very soon! I know I'm a little late for this, but this is great for those last minute costumes, and most of these items can be found in your home!

This tutorial doesn't require prosthetics such as liquid latex, scar wax, & spirit gum. Although these are very helpful, they can be very pricey & hard to find. The main item that you will need for the "rotting skin" effect is eyelash glue.
 
NOTE: If you are allergic to latex I suggest you do NOT use this. Eyelash glue has latex labeled in the ingredients & some people have an allergic reaction to it. This means when you apply the glue to your face, if it burns & itches or irritates the skin in anyway, grab makeup remover & remove it right away along with soap and water. If you happen to be allergic to it, you might have to stick with the pricey products. It's better to be safe than sorry sometimes. 


Here are the items I will be using
 
 From left to right: Red lipstick (preferably with a glossy [not shimmery] finish!) It doesn't really matter what shade of red you use. Red lipgloss works just as great! Make sure neither has a shimmery finish. 
Next, Eyelash glue. Make sure it dries CLEAR. Ones that dry black are going to be harder to make look natural.
Now for brushes, you don't need the exact kind as me. As long as you have 1 or 2 small flat brushes that can reach crevices for the contouring & one blending brush, then you're in the clear. 
Then there's the Q-tip. This will be to pat the foundation over the eyelash glue to match skin tone. The reason why I am using this instead of a concealer brush or makeup sponge is because lots of you are most likely to find Q-tips in your home.
 
 
 Foundation
 
 Grab a foundation about the same color as your skin. If it is too dark, than that is fine too, because it will conceal the light-colored glue a little better. I'm just using Revlon ColorStay. You can use whatever brand you like. ^_^


Eyeshadows
 
I am going to be using my Coastal Scents 88 Original Palette. If you have one of these or something similar (can be BH Cosmetics or Ebay palettes), you can use these & go along with me. If you don't have these, that's okay, just as long as you have a similar color to the eyeshadows that I number and list, then you are good to go.
 
Just make sure the colors are MATTE. No shimmer. Matte will make the contouring look more natural. If you use shimmer, not only will it make it look less natural, it will also reflect light from the shimmer and take away the depth from the contouring when being taken with a flash camera.

I will number them, and by the numbers, I will list the colors & what they will be used for.


(Sorry for the terrible quality on the picture. My phone likes to resize pictures -_-)

Okay listing the colors by numbers:

1. Skin tone shade. You need this to set the liquid foundation with when you apply it over the dried eyelash glue. *This actually depends on the shade & tone of your skin, so choose accordingly please.* I am a fair to medium skin tone, so I am choosing the shade numbered. The purpose of this shadow is to set the liquid foundation and keep it from slipping.

2. Red shade. This will act as a base for the "blood" & will cover the skin tone inside & outside the "wound."

3. Medium Brown shade. (or 2 shades darker than your skin tone) This will help contour the inside and out of the wound.
 
4. Dark Brown shade. (Or 3-4 shades darker than your skin tone) This will help gradually darken the blood and the contouring along with shadow number 3.

5. Black shade. This will go in the crevices making the wound look more realistic & 3 dimensional as well as giving the skin a "rotting flesh" effect.


STEP 1:


Apply the lash glue in any form you want that resembles a "wound","sore", ect. Make sure the shape is enclosed. If there are any bubbles (like you can see on my hand), you can either leave them be or pop them. I left them on because it gives the skin more of a "rotting" effect.
This may be the longest step to do, which is waiting for it to dry. Try putting your hand in front of a fan or use a COOL setting on a blow dryer to speed up the process. I wouldn't recommend hot air, because it can possibly melt the glue.


You will know when the glue is dry when you touch it. If you can touch it without the glue sticking to your fingers, then it's ready. Also the color and texture will change too when it is dried, like in the picture. Notice the bubbles added a nasty texture as well ;) Now we are ready for step 2.


STEP 2:


Grab your Q-tip (If you have a cosmetic sponge, that will work also), dab a little bit onto the q-tip or sponge, and LIGHTLY dab the foundation onto the dried glue. If you press too hard, the glue will lose its shape and can possibly tear, ruining your progress.


As you can see, it looks really messy & some of the foundation oxidized a bit, so the color is different now, but that's okay because it will be gone over with the skin tone eyeshadow (#1) & the other shadows. Moving on to step 4.


STEP 4:


After applying with skin tone eyeshadow over glue.

Apply the red eyeshadow (#2) inside the shape and along the outside. The reason why we are putting red on the outside, is to give the "sore" an irritated look. MOST (if not all) sores have red halos around them. Use your blending brush to evenly blend the outside of the shape, and so it fades outward onto the skin.


STEP 5:


Apply the medium brown shade (#3) along the sides inside the shape. Do not go in the middle. Just the sides. This gives depth.


STEP 6:
 

 Take the dark brown shade (#4) and apply it along the sides inside the wound, and make it darker in the crevices & corners. Try not to blend too much or it will look muddy. Do the same step on the outside as you did inside.
Do not go completely over the red on the outside, you still want it to show through a little.
As you can see, I also applied some of the shadow on the glue part to darken the skin as if it is "rotting" and to get rid of the shininess.


STEP 7: ALMOST DONE!
 
 
Apply the black shade (#5) ONLY ON THE CREVICE AREAS & CORNERS. Don't apply this shade all the way around. This is just to give the wound a little more depth.


STEP 8:
 
 
Take the small flat eyeshadow brush (a Q-tip can still work for this) or lip brush and apply the red lipgloss/lipstick on the inside of the shape. 
Apply by using PATTING MOTIONS ONLY. If you swipe, you can have the possibility of smearing the contoured shades making everything look muddy and not so 3D anymore. Don't be afraid to apply a little bit of the "blood" on the glue. 
The purpose of the lipstick/lipgloss is to make the wound look like real blood is coming out. (Obviously) :P

 
 And now we're finished!

 
Without flash


With flash
 

Side view to show 3 dimensional effect.


I also used it for a "Zombie" look.
 

I hope you guys enjoyed this blog tutorial! If you have any questions, feel free to ask me!


Happy Halloween!

Thursday, September 1, 2011

Best Beauty Products to travel with!

I love traveling! Plane that is! and I travel by plane a lot. But sometimes there are consequences you have to face when packing your makeup/toiletry bag. 

First of all, if you have any LIQUIDS OVER 3.0 OUNCES, you need to transfer them to the right size bottle. Anything over 3.0 ounces will be confiscated from your carry-on bag. -_- If you want to learn more about this click HERE. This is important if you are packing face wash/moisturizer or toner. (unless they are already travel sized.) If they don't have the shampoo/body wash you like in travel size, then use these little 3.0 bottles. I got mine from Wal-Mart.


They are really cheap, like $1.00 each, and they come in different containers, like spray bottles, screw-lid cream jars, & squeeze bottles, so it's pretty convenient for whatever you are packing! 


Caboodles Case


Caboodles is one of the most popular brands for makeup cases. They come in a wide variety of sizes and shapes. Whether you are packing for a trip, or just wanting something to store & organize your makeup in, this is a good brand to go by!


There's even a removable divider for easy organizing! :D


Mine I believe, is an "IT Bag", which is the smaller sizes of cases. I can't remember the specific name for this one, but I love it! The pattern is just adorable! It's small enough for travel and comes with attached rings to hold your brushes along with a plastic cover to protect them. (since this is a smaller case, it's better to use travel-sized brushes, because some regular brushes are too long) It comes with pockets everywhere on the sides to store whatever you'd like.

It zips up, so no worrying about anything spilling out of your case!


 As for the face, like I've mentioned before you definitely need to bring face wash & moisturizer. You need to always have a clean face wherever you go along with a good moisturizer to protect your skin and keep it hydrated. *Moisturizers with SPF are HIGHLY RECOMMENDED as it protects the face from harmful UV rays* It does not matter if you are traveling in the winter; your face can still be susceptible to harmful UV rays at any time of the year!

I decided to bring my Gigi's Daily Facial Cleanser, It's made from real dark honey & Acai berry. It removes makeup & impurities from the skin. It also smells very good, like a sweet smell, not quite like honey like it says. I love it because it's simple & doesn't have too much in it; it's a little more on the natural side. Products with too many harsh chemicals are not good for the skin. I had to transfer the face wash to a smaller bottle because it is way over 3 ounces.

I also use Gigi's Balancing Face Moisturizer. It contains Baobab fruit & Soy to protect & soften the skin as well as the dark honey is included too! It's also supposed to balance the skin's complexion out, while it  firms the skin as well, keeping it healthier looking. I didn't need to transfer this, because the bottle is only 2 ounces! Yay!


If you are interested in the Gigi brand here's the link: Click!


Garnier Nutritioniste Nutri-Pure Detoxifying Wet Cleansing Towelettes 

Perfect for travel! You don't necessarily have to buy this particular brand, but I will explain why I love it!
  • It obviously removes makeup.
  • It contains ingredients that help purify the skin & detoxify it, keeping it completely clean from everything.
  • It's very gentle on the skin with a pleasant scent to it. It hasn't irritated my skin like other makeup remover wipes.
  • It contains Vitamin B5, Vitamin E & Green Leaf Extract. This is very nourishing for the skin & helps restore complexion.
 
I love the fact that it completely cleans your face from everything including toxins. It comes in a resealable pouch so no need to worry about spills or drying out. And the best thing I love about this is: IT DOESN'T REQUIRE RINSING :D!!!! How more convenient can you get? You can use these practically ANYWHERE! You don't need sink or any water whatsoever. I think these are the best things to travel with instead of messy makeup remover bottles & cotton balls. Its like a sink and face wash in one! :D


  Oil-blotting sheets
A lot of you know what these are, so I won't hype on about it. They are little sheets that basically remove all the oils from your face & makes your face look less shiny. They are small enough to put in your purse, so they are great for traveling. A must for oily-prone skin! You can find them at any drug-store or supermarket in the face-cleansing aisle.


Revlon Illuminance Crème Shadow 


Very great for people who don't want to pack a whole lot of makeup, but would like some colors to pack in one. You don't even necessarily need brushes either, so that is a plus for light-packing. (You do however need to use CLEAN fingers if you do not pack brushes. I don't want to be the one to blame if you get an eye infection, haha.) 


I chose the color shades called "Skinlights" It's perfect for those who don't want a whole lot of color, but something that can add more definition to the eyes. The color, Skinlights also works great because they are neutral colors and and can go with any skin tone & any outfit for any occasion. 


It also comes with a nifty mirror. Not one of those cheap looking mirrors either. The view is pretty crisp, so you can see every detail when  you apply your eyeshadow.


It's pretty pigmented and doesn't really crease, so I don't believe you need a primer to apply before hand. However, you could use these cream shadows as a base for any powdered ones you layer over.

The shadows also come in different colors, so if you're more daring or just experimenting with colors, you can get different shades. If you want to check out the other ones, here is a link: Click Me! :)


Brush Guards


I was pretty skeptical about them at first, but I decided to give them a try. I'm a big Coastal Scents fan, so that's how I found out about these little guys.

These are good for protecting brushes, so the bristles won't bend or break. They come in different sizes and have different packs for specific kind of brushes. 

They are good for drying brushes after cleaning too.


Just slide the guard on (ALWAYS put on from bottom of handle first NEVER go against the bristles. This will prevent your brushes bristles from getting bent backwards & getting ruined!)


Tahdah!! Ready to store, travel, or dry! :D


If you are more interested in these brush guards click here.


I have beauty a tip for you! (Though some of you might already know this! :P)

Lipstick can be used as a multi-purpose beauty tool!


Skip the brushes & blush! Lipstick is an essential tool for light packers, because it can be used as a lip color (duh) AND a blush! Lots of people, including makeup artists, use this method when blush is not handy. All you do is apply a small amount on your cheeks and blend in, until harsh lines and blotches are gone. A lot of people prefer pink & coral-colored blushes, so be careful with red lipsticks!


If you have no idea what kind of makeup to pack, I will provide a small list for ideas.

  • Lipgloss - If lipsticks are not your thing, lipgloss can really brighten up your face & make your lips look fuller. It's a common beauty item found in most purses!
  • Mascara - Some people don't like eyeliner, but wear mascara. This is a must, because it will make your eyes look more awake & bigger without messy eyeliners.
  • Neutral shimmering eyeshadow - Another a mult-purpose tool for light packers, you can apply this to the brow bone & inner corners of the eye for more definition as well as applying it right above the cheek bone for a highlighter. (This will make the face "glow" and appear more radiant.)
  • Eyeshadow Palettes - This is for people who don't prefer cream eyeshadows. They come in wide varieties of colors, and this will keep you from packing tons of single eyeshadows.
  • Concealer - If you don't want to pack foundation, but want to cover up certain spots on the face, whether it's from pimples to under-eye circles, this a is very handy product. It's not as big as foundation bottles & you can carry it in your purse.
  • Travel Size Body Sprays - This is optional, but if you want to freshen up, (You never know who you might sit by LOL) this is a good item to have. Like the name says, make sure it does not exceed 3.0 fl oz.

    Another beauty tip: Be careful when deciding to bring liquid foundation that is not in your carry-on bag, because sometimes the pressure of  underneath the plane will cause the the bottles to possibly explode and cause a huge mess!


    Happy Traveling!!


    Wednesday, July 20, 2011

    Hold it! Wavemaker Beach Spray!


    I recently bought this at Sally's Beauty Supply, and I have been told it works good. I was pretty skeptical at first, because I've always had bad luck with hair products, so I thought I might give it a try. My hair doesn't like to make pretty beach waves by itself, so I was thinking I could use some help! 

    Well let me tell you, IT WORKS

    I absolutely LOVE this stuff! It smells like summer in a bottle, if you don't know what that smells like, I'll try my best to explain. It smells similar to Sun In Hair Lightener with a pleasant lemon scent.
    A little bit about this baby:
    It help creates texture for "at the beach hair."  It blocks moisture loss, so your hair doesn't get dried out & you won't end up looking like a frizz-ball lol. It also contains UV protectants to keep hair from getting damaged from the sun.
    You can spray it on damp or dry hair. It does not matter. :)
    All you need to do is spray it (not a whole lot, just enough for you to style it) and start grabbing your hair in a scrunch like motion and hold it for a few seconds. Do this a couple of times and viola! Beautiful beach waves, without the need of an actual beach!

    HINT: If you want super wavy beach hair, sleep in overnight braids, and use the spray the next day! :D

     I did mine with dry hair:


    This is great for cut-textured hair with layers (like mine) My hair doesn't feel weighed down at all by the product & it was very easy to style


          This is also great for those who don't have a lot of time getting ready in the morning or if you just have a busy schedule. By all means, I highly recommend this!


    Tuesday, July 12, 2011

    Summer Must Haves & Tips!

    Avon Magix Face Perfector
     
    This is prefect for those who tend to get really oily skin in the summer (like me!) What is really interesting about this product is that it comes out as a cream, but when you apply it to your face, it turns into a powder consistency. Pretty neat huh? It's very lightweight so this can be worn over or under your makeup. It's been said to reduce shine for up to 10 hours & also reduces the appearance of pores and fine lines. You don't need to use a whole lot, & just use for the areas that tend to get really shiny looking (a little goes a long way). It also contains SPF 20 which is great for those sunny summer days. I also like the fact that it has a translucent coverage so it's great for all skin colors! The smell (to me) is very tolerable; it smells like a light sunscreen. It also makes my skin feel very soft.

    Coral Lip Color!


    Who says you can't rock coral-orange lips? Orange is definitely a spring and summer shade. You don't have to wear a lipstick and go full out orange. If you just want a little color, try a coral-orange lipgloss or just lightly apply a lip liner or lipstick. It pairs very well with neutral eyeshadows. (You don't want to overdo the eyes with bright lips!). It is perfect for warm skin tones. If you are cool toned, try a little something with more blue-based pink in it.


    Waterproof Mascara


    Falsies by Maybelline is by far my favorite brand of mascara. It lengthens and thickens mascara. But any brand that is your favorite, stick to waterproof mascara for the summer. It's not only great for swimming but for humid conditions to wear you could possibly sweat your makeup off & comes in handy for those teary-eyed moments.


     Colorful Eyeliner
    I'm wearing Make Up Forever's Aqua Eyes waterproof eyeliner in "7L" (Turquoise)


    Summer is a great excuse to wear any bright eye colors, whether it's eyeshadow, eyeliners, or mascara. Now if you don't like all those crazy colors on your eyes with the eyeshadow, and you only want a little pop of color, all you need is a colorful eyeliner. Gel is preferred. It's handled very well with water and only comes off if you rub your eyes or taking it off with makeup remover. It's also easier to apply & remove than pencil liner. If you have no idea what colors to wear, you can always go by your eye color. Here is a simple guideline for first time trying.

    For Blue eyes, try blue, brown, or silver eyeliner. 


    For Brown eyes, try purple, gold, or a bronzy-pink color.


    For Green eyes, try plum, emerald, or a pink color.


    (note: purple has more blue tones than the plum color!)


    For a more dimensional look, apply a darker shade of eyeliner on the outer corners.

    Now everyone is different, like me for example, I think purples compliment my blue eyes, so DON'T be afraid to experiment with different colors. You don't have to go by the guidelines, they are just a few options for people who have never tried this. Be your own advocate :)


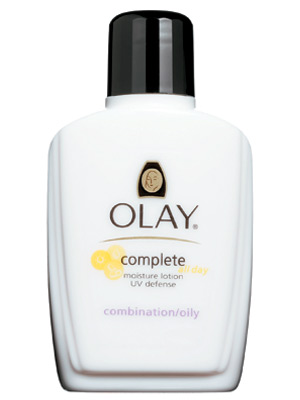
    A Moisturizer With SPF 15+


    It is a definite must have for summer. Moisturizers help the skin from drying out and many factors can associate with that in the summer. Like the pool for example, the chlorine can be very drying to the skin. The hot sun can also be very drying and damaging to the skin, so make sure there is SPF in the moisturizer that you are buying. Be careful though, you don't want to wear this if taking pictures with FLASH on your camera in a dark area, this can cause your face to be white as a ghost and not matching the rest of your body. The SPF reflects off the light from the flash and causes "ghost face". It doesn't  happen to everyone, but I'm giving you guys a fair warning. :P  Try applying a face primer with NO SPF after applying moisturizer (with SPF) and then apply your foundation with NO SPF. Sounds confusing, but will prevent "ghost face." hehe.


    Ombre Nails!


    I've been noticing the "Ombre" trend on the nails are very popular this season. It's been around for many years & is a very fun and interesting look. If you don't know what the ombre style is, its basically a color fading into another, usually from the same color family. There are 2 different types of ombre-style nails.

    This effect is the one where each nail has a different shade (of the same color family) on each nail, either making it from darkest shade to lightest or vise versa. This will give the effect of the colors fading into each other with each nail.


    Then you have the gradient-like effect where the color fades from top to bottom on each nail. Personally, this is my favorite style because you can use different colors. 


    How to do the gradient-effect:
    It's very simple to do. All you need is a cheap cosmetic sponge, white nail polish, and 2 or 3 different shades of the colors you want to apply including a color in between to help blend the 2 main colors together, and a top coat. 

    Apply 1-2 coats on your nail with the white polish (this will help the gradient stand out better.) 
    Then apply the lightest shade out of your choices (paint to about the middle section of the nail). 
    Then drop a few drops of the polish of your choice for the middle section onto a piece of cardboard or something you don't mind getting polish on. Dab your sponge into it and immediately start dabbing the middle section of your finger and you will notice that it's giving off the "fading" effect. 
    If you are using 3 shades then go ahead and apply the 3rd shade with the sponge as well to the bottom or top (depending on if you do the darkest at the top or bottom.) Don't go too far over each color, because you still want the colors to show through & you want to avoid it looking too "murky". Apply a topcoat and you're done!


    Here's the same style that I did on my toes with a coral and a yellow. Ahh toes in the sand<3 and yes my toes are long, haha. This was at Point Pleasant Beach, NJ btw :)


    No Heat Beachy Waves & Different Types


    Do you want to have that at the beach hair, without using heat? Make sure to plan it a day ahead, because this is an overnight procedure. 
    Okay okay, we all know braiding your hair & sleeping in it overnight is one of the ways, but if you braid them different ways, you can get different looks!

    Fishtail braid waves - These are a little bit more messy, but that's the point! The waves are tighter and a little but smaller, (depending on how you divide the braids)
    If you don't know how to do a fishtail braid here's a video show you! 
    http://www.youtube.com/watch?v=dcNCn1gbhXg

    Regular braids -  These are more popular than the others. It will make bigger waves than the fishtail.

    French Braids - The difference is french braiding will give you more volume at the top of your head, so if you need more volume, then try this method!

    For all of these methods, apply a texturizing spray to you hair and roots to keep the hairstyle looking more natural and to keep it's shape. Try avoiding regular hairspray if you want a soft look.

    I will let you find out the results on your own ;) Try it out!


    Here's me with the fishtail braid waves going on!


    Rimmel London Nautral Bronzer!


    This one is also a budget-friendly product! Not a big fan of bronzer, BUT once I tired this one, I grew a huge liking to it. I recently started tanning, so this helps a lot to darken the face & match the rest of your body just a little with a sun-kissed glow. It also helps to lightly contour the face! 
     There's no shimmer to it, and that is why I love it. Bronzing products with shimmer in them tend to make me look like an oil slick, but everyone's skin type is different. If you have oily-prone skin, try to avoid products with shimmer in them...they can tend to make your skin look more oily than it normally is. This product is great for people [like me] who have this problem!

    Since this is a more natural finish, if you are looking to dramatically contour the face, I wouldn't recommend this because using too much can look too orangey; it's meant for light usage.


    Lemon Juice as a highlighter?


    Yes, I'm sure you've heard of this. I love it. It lightens my hair up just a little to bring out my natural highlights. All you need is some lemon juice and a spritzer bottle, and you're good to go. Just dampen your hair a bit and spray it on. Then lay out in the sun for about 20 minutes. It won't happen drastically, but if you do it for days in a row, you will start to notice your hair getting lighter. It beats spending dollars on store bought lighteners that works just the exact same.


    I will add more to this post if I try any new summer items! 

    Love, Ash